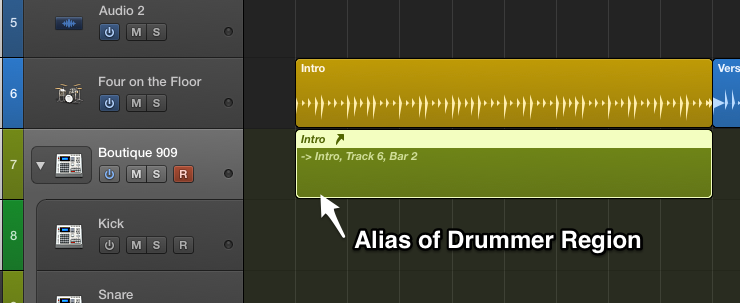
One of the cool tricks you can do with Logic’s Drummer regions is to drag out an alias of the Drummer region to another software instrument track. (Drag a Drummer region with mouse while holding Shift-Option).
Aliases are virtual regions with no content of their own – they just follow another region’s content (although you can still do stuff to them like transpose them etc).
This new software instrument track can be another Drum Kit instrument, or a Drum Machine, sampler or even a third-party drum instrument like Slate’s SSD drum sampler.
Now your new instrument track (via the alias) will play exactly the same thing as the Drummer pattern. Even if you go back and tweak Drummer the alias will still follow it. And if you mute the Drummer region, the alias still works, and you will continue to hear the Drummer pattern through your new drum instrument.
That’s pretty cool, but what if you don’t want to layer the entire kit – perhaps just the kick or the snare?
That’s easily done too;
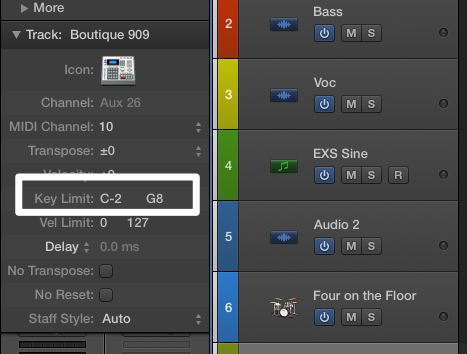
On the new alias instrument track, go to its Track Inspector pane. It’s the second box down in the Inspector window on the left. It’s usually hidden, so you might have to click the little disclosure triangle to pop it down.
Now you should see a “Key Limit” line, with something like “C-2 G8” in it. These are the low and high key limits, and it means that this track will currently accept MIDI notes over the full range of possible MIDI notes from C-2 up to G8.

If you only want to trigger the kick, double click the “C-2 G8” and type in “C1”. You should see two C1’s – meaning only this one MIDI note will now be accepted. You should only hear the kick drum.
And if you want a layered snare as well?
With the same instrument; Create another Virtual Track going to the same instrument; Menu: Track/Other/New with Same Channel
Drag a copy of the alias to this track. (Option-drag alias with mouse)
On this track, double click the Key Limit numbers and type in “D1”. This will now only accept the snare MIDI note.
With another instrument; Create another software instrument track and dial up a drum patch.
Drag a copy of the alias to this track. (Option-drag with mouse)
On this track, double click the Key Limit numbers and type in “D1”. This will now only accept the snare MIDI note.
As you’ve probably figured out by now, you can carry on and layer as many extra kicks and snares on different drum instruments as you feel like.
Bonus tip for handy kick and snare layers:
Load up an instance of an EXS24 in a new instrument track. (In the Patch Library select Legacy/Logic/Logic Instruments/EXS24)
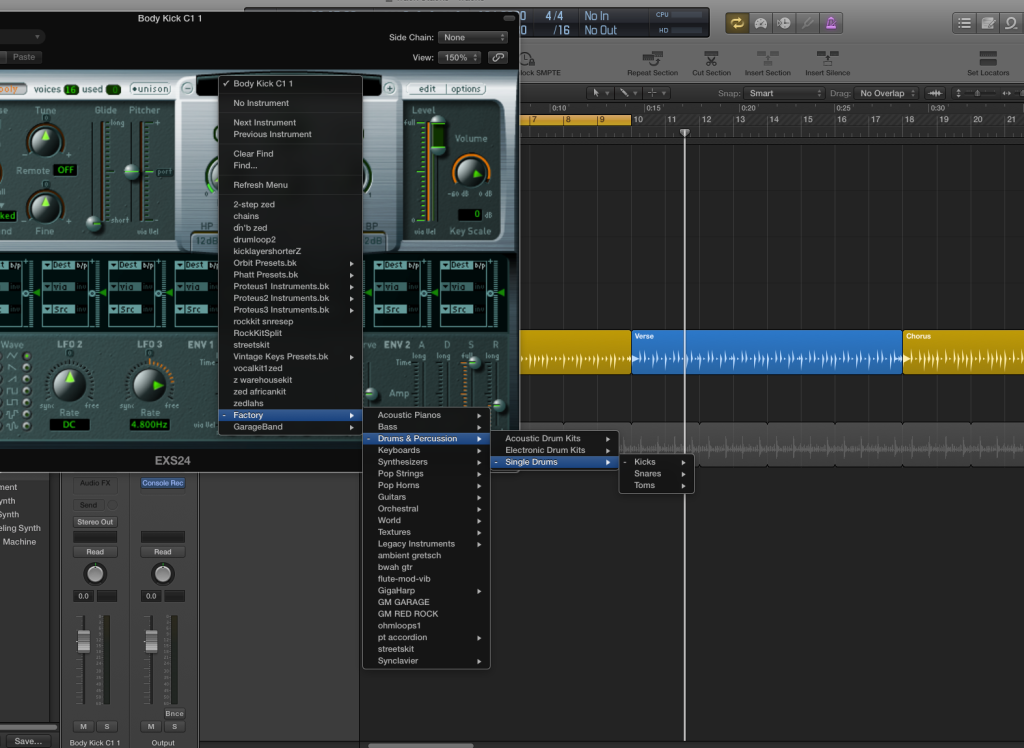
Click the EXS24 slot on the channel strip to open the EXS24 front panel up.

In the little panel above the Cutoff Knob, click and select Factory/Drums & Percussion/Single Drums/Kicks/Layer Kicks/Body Kick C1 1. If you click the little “+” symbol to the right of the panel you can step through each sample in turn.
As you can see there’s a whole bunch of “body” and “transient” kicks (and snares) that can be used to layer your existing kicks (and snares). Some of these sound great, although the “body” kicks sound unusual by themselves as they’ve had the transient part trimmed off the front.
Drag your Drummer alias onto one of these EXS24 tracks and set the Key Limits for the track as explained above and you’re away laughing.
